User Guides
A collection of product specific user guides are to be found here. For programming guides please refer to the System Description to find the appropriate documentation. If you do not find a guide for the operating system try looking at the Raspberry Pi OS Docs
Illumination Selection
This guide will explain how to enable/disable the epc670 ToF HAT+ 150° LED and the epc670 ToF HAT+ 80° LED:
Open a terminal
Check the current state:
pinctrl get EN_LED_1,EN_LED_2
Select one line to copy:
pinctrl EN_LED_1 op dh          # Enable 150° LED
pinctrl EN_LED_2 op dh          # Enable 80° LED
pinctrl EN_LED_1,EN_LED_2 op dh # Enable 150° and 80° LED
pinctrl EN_LED_1 op dl          # Disable 150° LED
pinctrl EN_LED_2 op dl          # Disable 80° LED
pinctrl EN_LED_1,EN_LED_2 op dl # Disable 150° and 80° LED
Paste into terminal and execute by hitting ‘Enter’
Close terminal
Important
This change will be reset upon next boot.
Remote connection
Requires:
Internet Access (via built-in wifi or ethernet)
It is also possible to connect remotely either through SSH or using Raspberry Pi Connect.
Remote using Raspberry Pi Connect
Refer to the Raspberry Pi Connect Documentation.
Remote using SSH
Refer to the Raspberry Pi Remote Access with SSH Documentation. Follow instructions fro “From the terminal”
Update Packages
Requires:
Internet Access (via built-in wifi or ethernet)
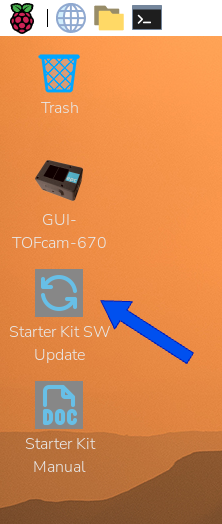
To get the latest version of the epc670 softwares run the command below from the terminal or execute Starter Kit SW Update desktop program.
epc-update
HDMI Resolution Selection
This guide will explain how to set a different resolution than the automatically detected resolution.
Note
The epc670 Starter Kit will automatically reduce the resolution to FullHD or lower to avoid performance drop. This occurs upon boot or when connecting a screen.
Open a terminal
Check available output and sizes
wlr-randr
The output will look similar to this:
    HDMI-A-1 "Dell Inc. DELL S2721DS DJ81VY3 (HDMI-A-1)"
    Make: Dell Inc.
    Model: DELL S2721DS
    Serial: DJ81VY3
    Physical size: 590x330 mm
    Enabled: yes
    Modes:
        2560x1440 px, 59.951000 Hz (preferred)
        1280x1024 px, 60.020000 Hz
        1152x864 px, 75.000000 Hz
        1280x720 px, 60.000000 Hz (current)
        1280x720 px, 59.939999 Hzz
        800x600 px, 75.000000 Hz
        640x480 px, 60.000000 Hz
        720x400 px, 70.082001 Hz
    Position: 0,0
    Transform: normal
    Scale: 1.000000
    Adaptive Sync: disabled
Set desired mode
wlr-randr --output HDMI-A-<output_nr> --mode <width>x<height> # Replace output number (1 or 2), width and height with available mode listed above.
Close terminal
GUI autostart disable
By default the GUI starts upon a boot.
Open a terminal
Run following command:
sudo rm -f /home/epc/.config/autostart/TOFcam670.desktop
To re-enable the autostart proceed as follows:
Open a terminal
Run following command:
echo "[Desktop Entry]
Version=1.0
Name=GUI-TOFcam-670
Comment=Autostart GUI-TOFcam670
Exec=lxterminal -e /usr/lib/epc670/tofcam670-startup.sh
Terminal=false
Type=Application
X-GNOME-Autostart-enabled=true" | sudo tee /home/epc/.config/autostart/TOFcam670.desktop