Getting Started
This page shows how to set up the epc670 ToF HAT+ on a raspberry pi. The documentation will focus on the bare epc670 ToF HAT+ description for custom HW integration. For use with a Raspberry Pi it is recommended to proceed to the epc670 Starter Kit documentation after installing the epc670 ToF HAT+.
Preparations
Make sure you have the following ready for access:
epc670 ToF HAT+
FFC Ribbon 22 pos. 0.5mm, 30 mm
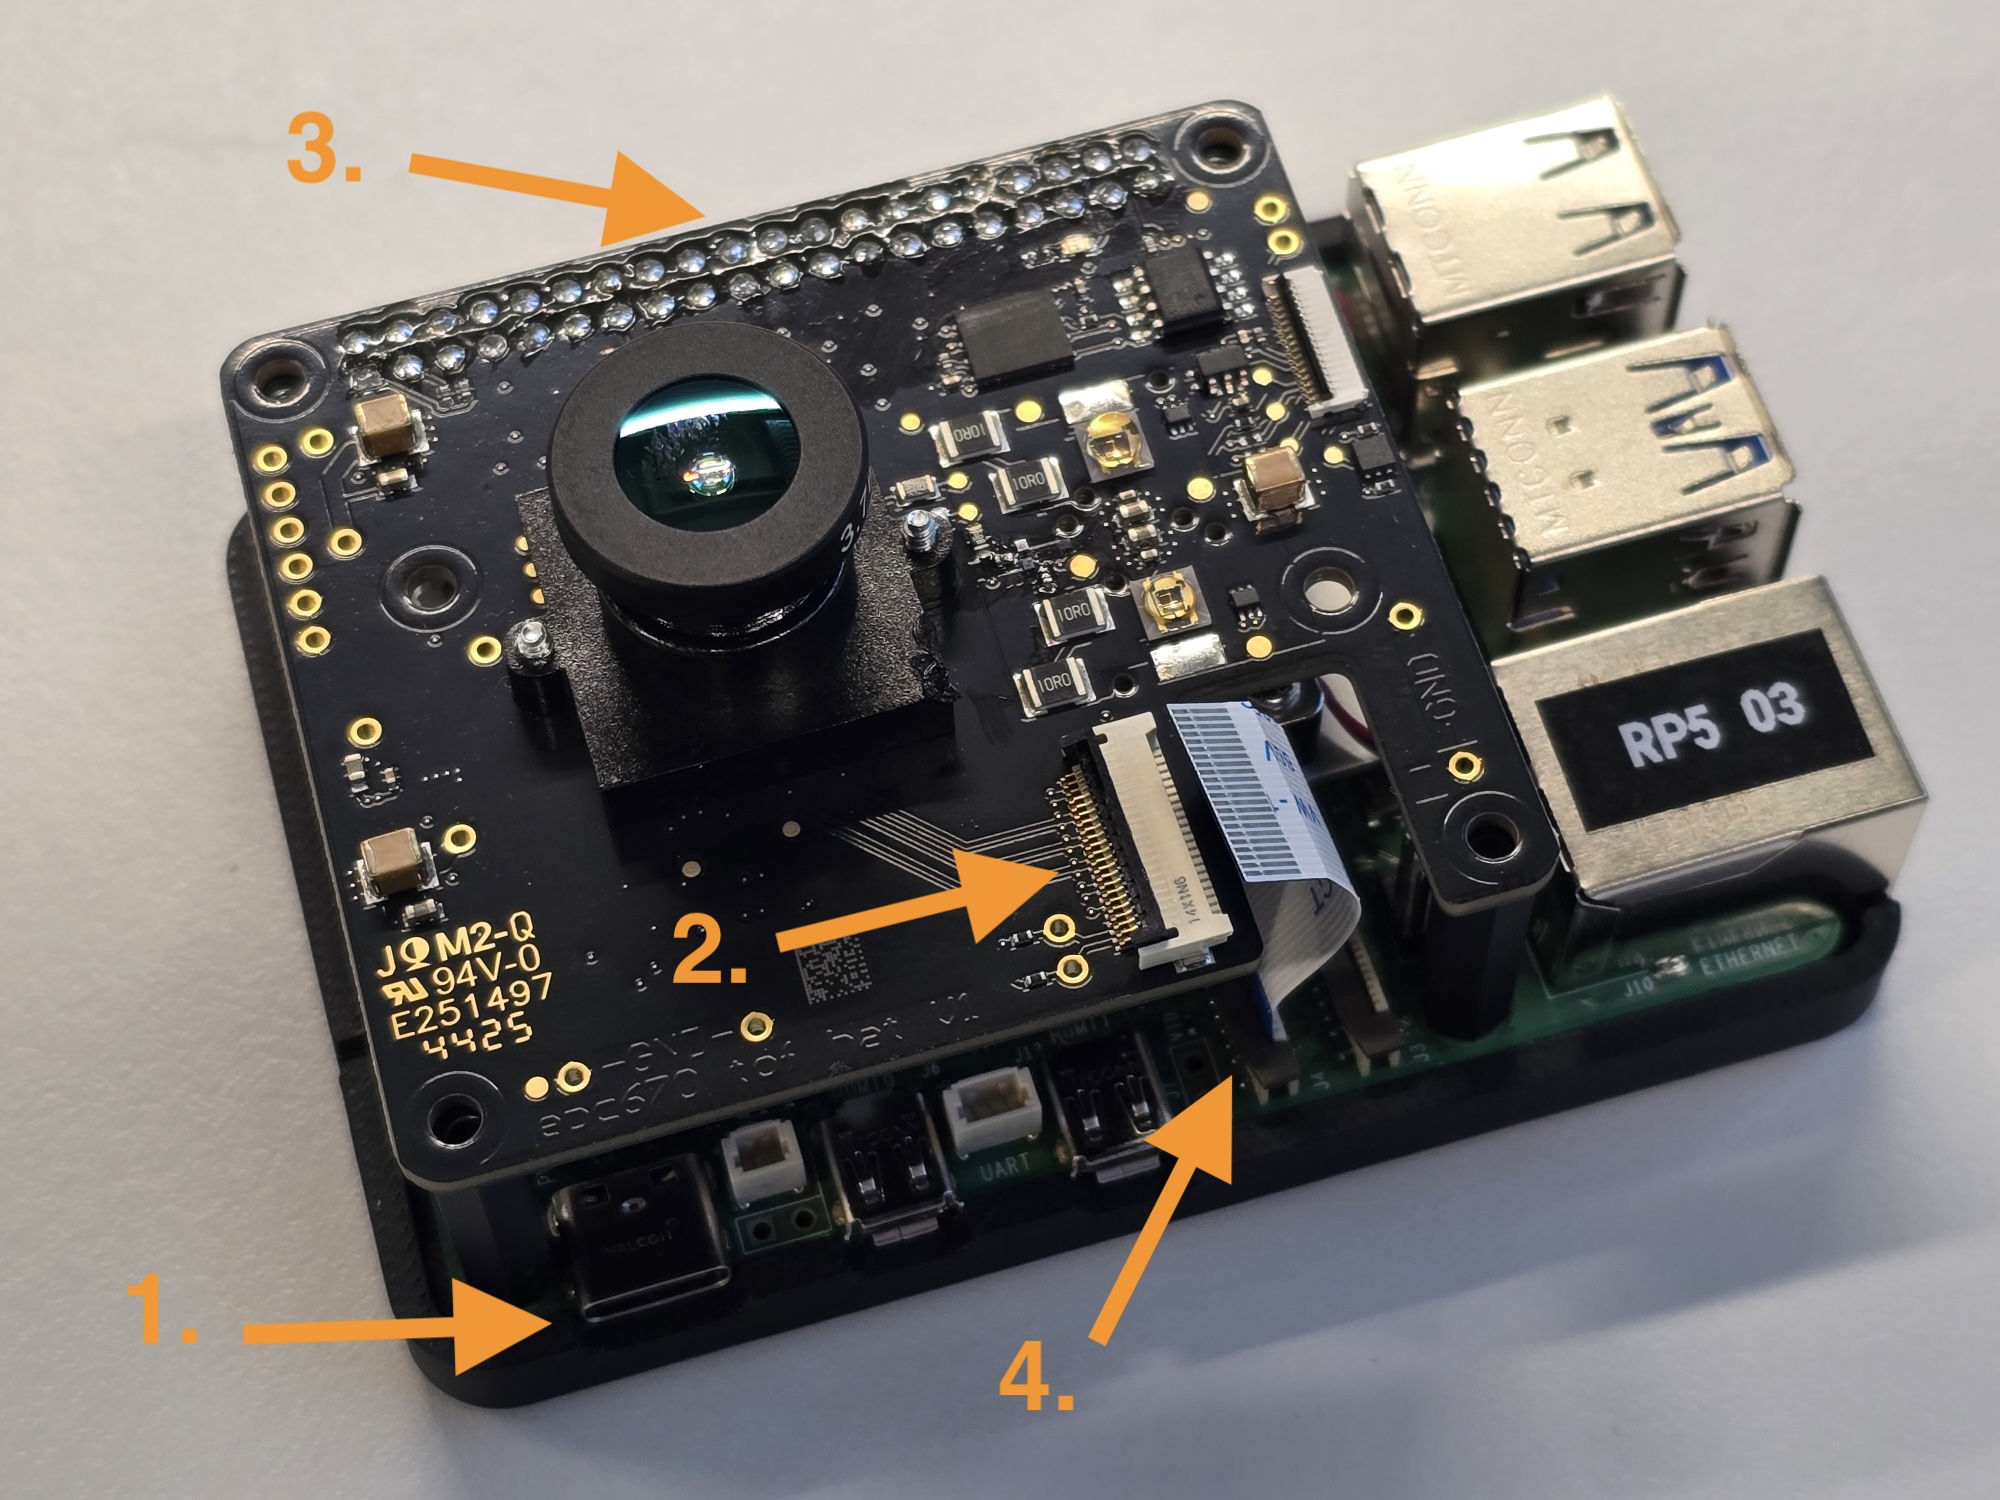
Connect HAT
Ensure raspberry pi has no power supply connected
Connect the bottom end of the FFC ribbon to Raspberry Pi
Open/Release the connector by lifting the black latch.
Insert ribbon with the blue stiffener facing the HDMI connectors on the raspberry pi ath the “CAM/DISP X”connectors. For usage with the epc670 ToF HAT+ OS Image connect it to “CAM/DISP 1” connector
Close/Fixate the connector by pressing the black latch.
Connect epc670 ToF HAT+ on the 40-Pin Connector so that it stacks with the Raspberry Pi
Connect the FFC ribbon top end to the epc670 TOF HAT+
Open/Release the connector by lifting the black latch.
Insert the ribbon with the blue stiffener facing the PCB on the epc670 ToF HAT+ at the connector next to the recess.
Close/Fixate the connector by pressing the black latch.
What’s Next
It is recommended to use the epc670 ToF HAT+ OS Image as the base image. Refer to the OS Image Flashing on SD-card user guide for flashing and to the epc670 Starter Kit for image documentation.
Alternatively there are debian packages available for the following:
Name |
Package Name |
Description |
|---|---|---|
epc670 TOF HAT |
epc670-tofhat |
Device Tree, driver for epc670 TOF HAT+ |
epctofcam lib |
libepctofcam-dev |
ESPROS ToF Cam API(Python, C++) to grab images from the Device Driver |
epc670 driver |
epc-drivers-uapi-dev |
Device Driver for epc670 sensor |
To be to get the packages refer to Install Package Apt Repository user guide.
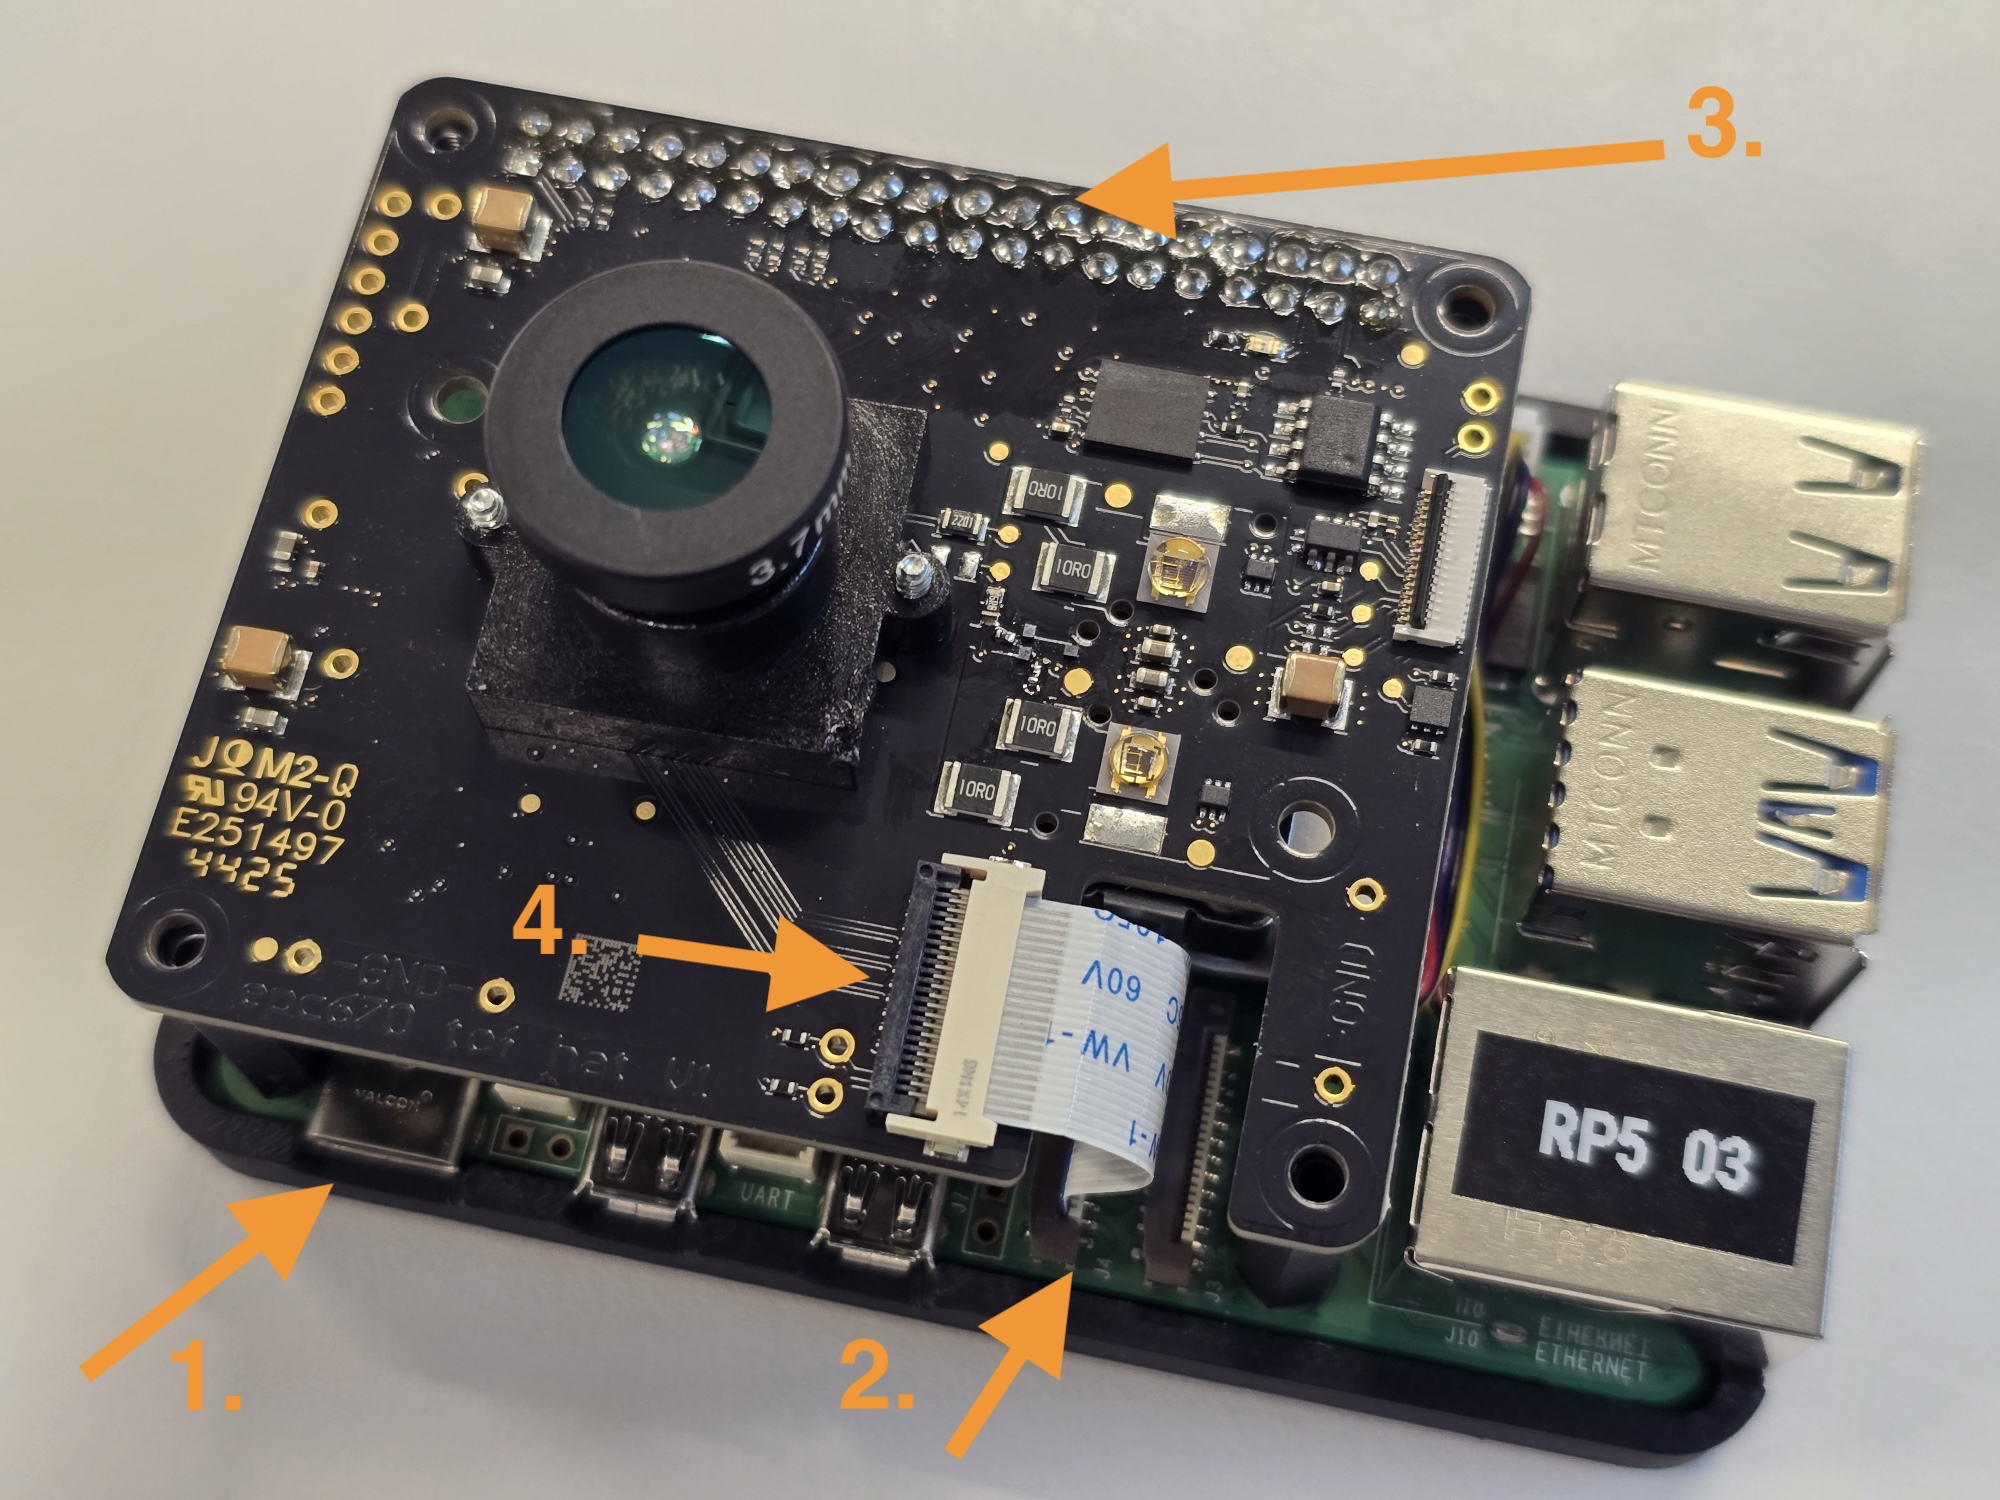
Disconnect HAT
Ensure Raspberry Pi has no power supply connected
Disconnect the FFC ribbon top end from the epc670 TOF HAT+
Open/Release the connector by lifting the black latch.
Remove the ribbon with the blue stiffener facing the PCB on the epc670 ToF HAT+ at the connector.
Disconnect epc670 ToF HAT+ on the 40-Pin Connector so that it stacks with the Raspberry Pi
Disconnect the FFC ribbon bottom end from Raspberry Pi
Open/Release the connector by lifting the black latch
Remove the ribbon with the blue stiffener facing the HDMI connectors on the Raspberry Pi at the “CAM/DISP X”connectors. For usage with the epc670 ToF HAT+ OS Image connect it to “CAM/DISP 1” connector